Controlling Your App Using Speech
Natural language user interfaces are everywhere in tech these days. Amazon wants to assist you in the home with Alexa in the Amazon Echo. Apple recently opened up Siri to third party developers to enable you to book rides, send messages, and more, just by speaking to your phone. Google and Microsoft are both in on the act too. The soon to be released AirPods allow for a simple double tap of an AirPod to begin speaking to Siri.
After only a few days with Apple's wireless AirPod headphones, it's clear that there will be a huge platform business based on the reliable, persistent availability of a contextual artificial intelligence that can talk to you and receive commands.
However, Siri integration is currently limited to a fairly small set of use cases. What if you want to take advantage of speech driven interfaces inside your app right now? Thanks to technologies introduced in iOS 10, you can.
A Quick and Contrived Example
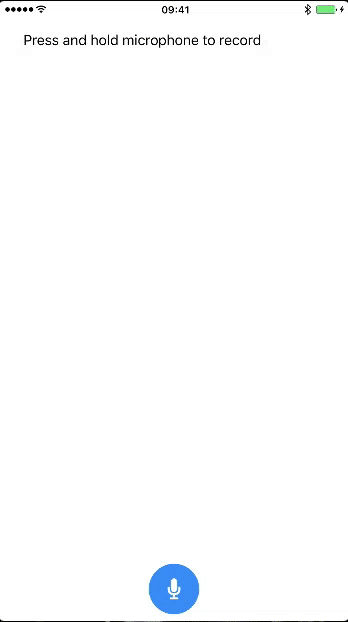
To see how speech can be used to control an app, check out the example Github project. This app takes the user's spoken input, detects colours that are spoken and uses them to modify the look of the app:
This is quite clearly a contrived example - using speech recognition to change background colours is not very useful! However, taking spoken input such as "show me my unread messages", "show me more photos like this", or "undo the last two things I changed" allows users to express simple or complex actions in a natural way, without having to navigate a custom user interface. To be clear, speech should not be used as a replacement for your app's UI, but can be used to augment it to allow users to achieve what they want to do more naturally, where natural language can clearly express the intent. Teaching your users exactly which grammars your app understands is worthy of a separate discussion.
Speech Capture APIs
To capture speech, we need to make use of iOS 10's new Speech framework. There are three classes that we need to know about:
- SFSpeechRecognizer is the class that encapsulates iOS's speech recognition functionality. It includes functions to request authorisation to use speech recognition (which need to be called before recognition can begin), as well as functions to perform speech recognition tasks. One important property to consider is the isAvailable property, which is set to false when speech recognition is not available.
- SFSpeechRecognitionTask is used to represent an individual speech recognition session. Tasks are created by calling the recognitionTask: functions on SFSpeechRecognizer, and are queued on the recogniser's queue property. This queue defaults to the main queue, but can be changed if you would like to handle the task's results on a different queue. A reference to the task object should be kept if you would like to be able to programatically cancel speech recognition sessions.
- SFSpeechRecognitionRequest - we need to pass one of these to our speech recogniser when a speech recognition task is created. This object allows us to customise the transcription behaviour by specifying a task hint that tells iOS what kind of input we are expecting from the user. We can also give the recogniser hints about words to be recognised that aren't in the system dictionary by using the contextualStrings property. We can also specify whether we want to receive partial results from the speech recogniser or not by changing the value of shouldReportPartialResults.
Implementing Speech Recognition
Now let's look at how to go about building an app that takes advantage of this new framework to capture speech input from the user.
First we will need to specify two Info.plist entries to allow us to access the device microphone, as well as make use of the speech recognition facility. These keys are NSMicrophoneUsageDescription, and NSSpeechRecognitionUsageDescription. You will need to provide a String value for both of these keys describing why your app needs access to these features.
Next, let's look at the code required to request access to speech recognition. The following code assumes you have a class with the following properties:
/// The speech recogniser used by the controller to record the user's speech.
private let speechRecogniser = SFSpeechRecognizer(locale: Locale(identifier: "en-GB"))!

/// The current speech recognition request. Created when the user wants to begin speech recognition.
private var recognitionRequest: SFSpeechAudioBufferRecognitionRequest?

/// The current speech recognition task. Created when the user wants to begin speech recognition.
private var recognitionTask: SFSpeechRecognitionTask?

/// The audio engine used to record input from the microphone.
private let audioEngine = AVAudioEngine()
Notice that we provide the speech recogniser with a Locale when it is initialised. This initialiser can fail if the given locale is not supported. In a shipping application this case will need to be considered. You can find out whether a locale is supported or not using the supportedLocales function on SFSpeechRecognizer.
Notice also that we are using SFSpeechAudioBufferRecognitionRequest, which is a subclass of SFSpeechRecognitionRequest geared towards recognising speech in an audio buffer.
We also have an instance of AVAudioEngine. This is used to capture the microphone input that will be passed to our speech recognition request.
Now, let's dig in to some speech recognition. First we need to check is speech recognition is available:
guard speechRecogniser.isAvailable else {
    // Speech recognition is unavailable, so do not attempt to start.
    return
}
Speech recognition may be unavailable if there is no internet connection on older iOS devices. However, on more modern handsets, speech recognition can be performed completely offline.
Next, we need to check if we have permission to use speech recognition, and if not, request it:
guard SFSpeechRecognizer.authorizationStatus() == .authorized else {
    SFSpeechRecognizer.requestAuthorization({ (status) in
        // Handle the user's decision.
    })
    return
}
The requestAuthorisation completion handler does not call back on the main queue, so if you update your UI based on the result (as you should do in shipping applications) you will need to dispatch on to the main queue.
If we have cleared this hurdle and we have authorisation to use speech recognition then the first thing we need to do is configure our audio session:
let audioSession = AVAudioSession.sharedInstance()
try audioSession.setCategory(AVAudioSessionCategoryRecord)
try audioSession.setMode(AVAudioSessionModeMeasurement)
try audioSession.setActive(true, with: .notifyOthersOnDeactivation)

recognitionRequest = SFSpeechAudioBufferRecognitionRequest()

guard let inputNode = audioEngine.inputNode, let recognitionRequest = recognitionRequest else {
    // Handle error
    return
}
The guard statement makes sure that we have the microphone input and that recognition request object was created successfully. If either of these fail then we cannot begin speech recognition.
Now it is time to create a speech recognition task. We do this as follows:
recognitionTask = speechRecogniser.recognitionTask(with: recognitionRequest) { [unowned self] result, error in
    if let result = result {
        let spokenText = result.bestTranscription.formattedString
        print(spokenText)
    }

    if result?.isFinal ?? (error != nil) {
        inputNode.removeTap(onBus: 0)
    }
}
Let's break this down. We ask the speech recogniser for a speech recognition task using the recognition request we created earlier (the instance of SFSpeechAudioBufferRecognitionRequest). We provide a result handler to the speech recogniser that is called each time the speech recognised by the recogniser is updated. If there is a result, we get the best available transcription as a string and print it. If you wish to use speech to control your app you will need to pass this transcribed text to the code you use to control your app.
If there is an error, or the result indicates that it is the last update we will receive (when its isFinal property is set to true), then we want to remove the input node's tap on bus 0. We will see where this was added in a moment.
Having created the recognition task, we need to configure our audio engine to record audio and pass it to recognition request. This is done as follows:
let recordingFormat = inputNode.outputFormat(forBus: 0)
inputNode.installTap(onBus: 0, bufferSize: 1024, format: recordingFormat) { (buffer: AVAudioPCMBuffer, when: AVAudioTime) in
    self.recognitionRequest?.append(buffer)
}

audioEngine.prepare()
try audioEngine.start()
This takes the input node from our audio session and allows us to respond to updates to its audio buffer with a closure. In this closure, we append the contents of the input node's buffer to our speech recognition request, which processes the audio data in the buffer for speech.
Finally, we tell the audio engine to prepare its resources for audio input, and tell it to start. We are now in a position to start receiving transcribed text from our speech recognition request.
When we eventually want to stop recognising speech we simply need to do the following:
audioEngine.stop()
recognitionRequest?.endAudio()
This stops the audio session, which can now relinquish the resources it uses for processing audio. We also tell the recognition request that it will receive no more audio. Doing this means that our result handler will be called one final time, with the result's isFinal property set to true. It is at this point that you would then act on the transcribed command from the user.
Conclusion
Today we've seen how to use iOS APIs to capture user's speech and transcribe it in to natural language text. Breaking down complex spoken commands to make them actionable in code is beyond the scope of this post, whose purpose was simply to demonstrate the purpose and and method of using speech recognition to control apps. However, if you wish to pursue the idea further, NSHipster's article on NSLinguisticTagger is a great place to start as it demonstrates Apple's API for obtaining the pertinent information from natural language text, which will help you convert it in to commands for your app to follow.
Siri integration may currently be limited to a handful of use cases, but hopefully I've shown that if you wish to integrate voice control directly in your own apps, then with iOS 10 there really is nothing to stop you. If you hadn't considered it before, maybe now is the time to think about whether voice control could provide value to users in your apps. If you haven't already, checkout the sample project and give it a try yourself.