Indexing App Content with Core Spotlight
The search functionality built in to iOS has for years been a weak point of the operating system, mainly due to being limited to only searching within first-party apps like Mail and Messages. This left the majority of users' content siloed in third-party applications, only to be retrieved by search functions included within those apps (if any).
With iOS 9, Apple added new APIs to allow third-party apps to integrate with the system wide search, vastly increasing its power and utility to users. These APIs are based around 3 technologies:
- NSUserActivity has gained extra capabilities in order to be indexed in to the Spotlight database. This allows you to index particular activities within your app as your user performs them e.g navigating to a particular screen or creating a piece of content. Indexing these activities allows users to return to them through the iOS search user interface.
- CoreSpotlight is a new framework that allows you to add content created in your app to the on-device Spotlight index. When a user selects a search result from one of the items that your app added to the index then the app receives a deep link containing the indexed information, allowing for navigation straight to the content that the user selected.
- Web Markup allows structured data from web pages to be indexed by Apple and displayed in the iOS search UI to provide richer search results than a standard web search might find.
These technologies cut across two privacy levels available in the Spotlight index - Public and Private. All Web Markup is added to the public Spotlight index hosted by Apple, and Core Spotlight only allows application content to be indexed in the private on-device spotlight index. Only NSUserActivities that are indexed can be both public and private.
Today we will be focussing on one type of interaction with the search APIs - indexing application content using Core Spotlight. Specifically, we will be adding the data from the Counties app used in the Adaptive User Interfaces article to the Spotlight index so that county information can be retrieved from iOS's search UI. We will also implement deep linking in to the application content from the selection of a search result. If you would like to follow along at home the code it is available here.
Indexing
In order to add a piece of application content to the on-device Spotlight index we must create an instance of CSSearchableItemAttributeSet. In here we store information about the content that we would like to be indexed.
let attributeSet = CSSearchableItemAttributeSet(itemContentType: kUTTypeData as String)
attributeSet.title = county.name
attributeSet.contentDescription = county.populationDescription
if let countyFlag = county.flagImage {
    attributeSet.thumbnailData = UIImagePNGRepresentation(countyFlag)
}
Once we've stored the attributes we wish to index we need to assign them to a CSSearchableItem which is the object that is passed to Spotlight for indexing:
CSSearchableItem(uniqueIdentifier: county.name, domainIdentifier: nil, attributeSet: attributeSet)Note that we pass in the attributes that we created earlier, as well as a unique identifier. This identifier will be used when a search result is selected so that the app can navigate to the selected county. As county names are unique we can just use that.
Next, all we need to do is get a reference to the Spotlight index with a call to CSSearchableIndex.defaultSearchableIndex() and call indexSearchableItems:completionHandler: with the searchable items that we created for our counties and we're done with indexing.
Now, let's see what happens when we make a search in the iOS search field:
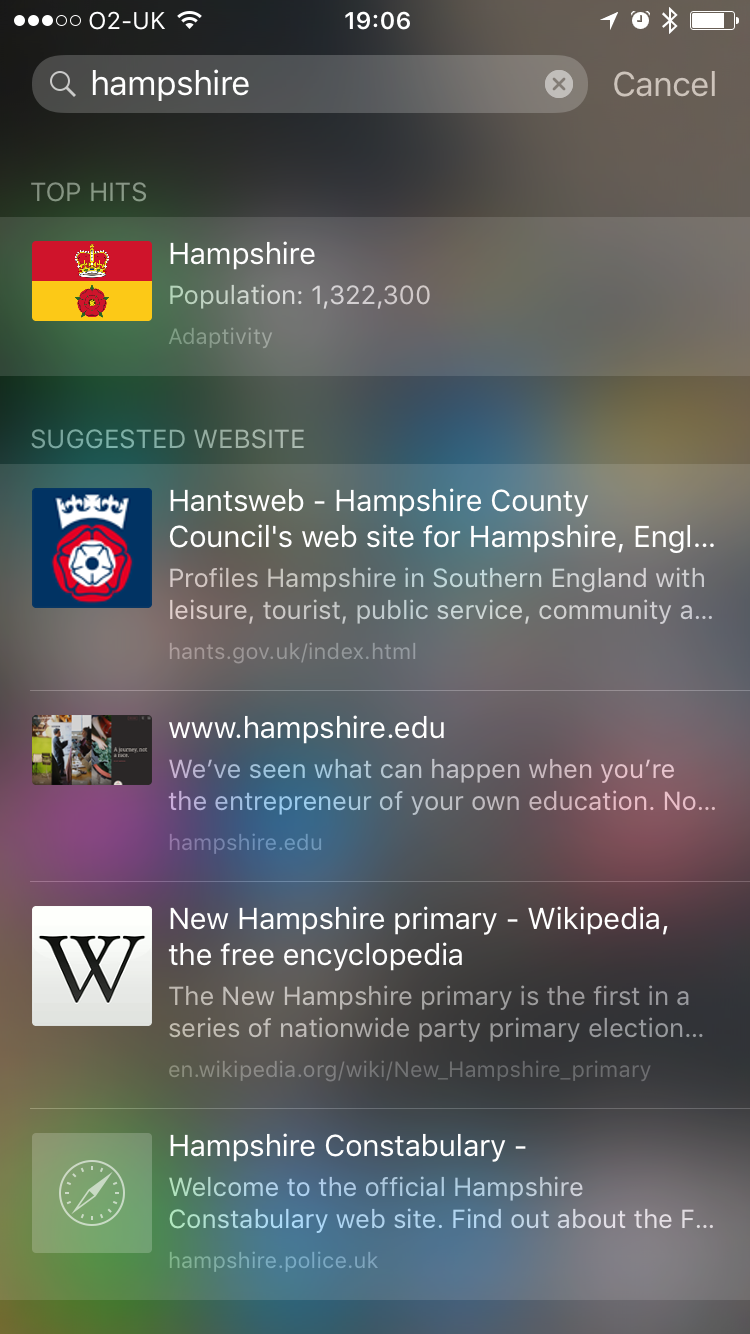
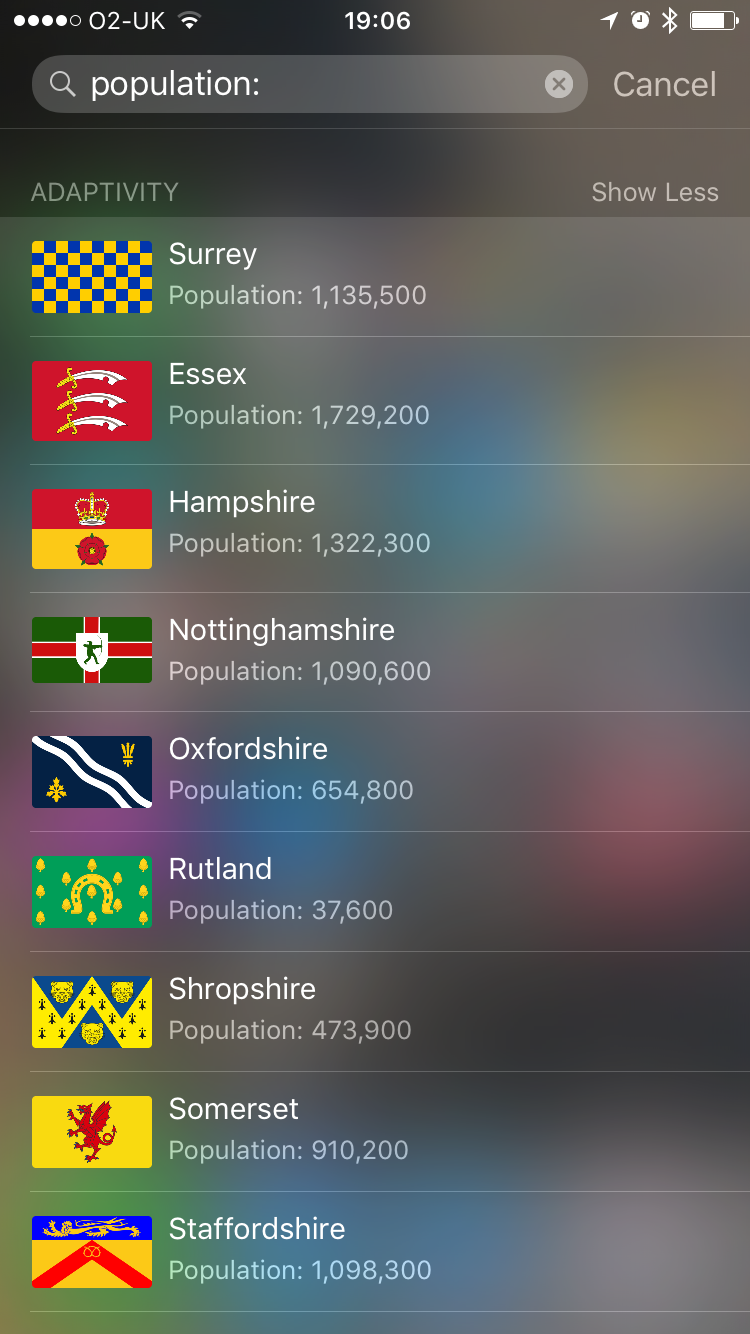
Excellent! Our app's indexed data is being served up in the search UI, just as we wanted. Note too that all of the indexed attributes can be search for, so we can even match on the content description:
Responding to Search Result Selection
If a user taps on one of these search results then we want to show the selected county in our app. We start by implemented a new method on our app delegate, which is application:continueUserActivity:restorationHandler:. In here we just need to get the selected county from the searchable item and present it:
func application(application: UIApplication, continueUserActivity userActivity: NSUserActivity, restorationHandler: ([AnyObject]?) -> Void) -> Bool {
    if userActivity.activityType == CSSearchableItemActionType {
        if let county = County.allCounties.filter({$0.name == userActivity.title}).first {
            viewController.showCounty(county, animated: false)
        }
    }
    return true
}
We simply use the title of the activity item to identify the county to be shown, and then request that it be presented to the user. Simple!
Note that the code here for presenting the county UI has been simplified, but you can see a working example in the sample project.
Extended Search Item Attributes
In our above example we created a very simple instance of CSSearchableItemAttributeSet containing just a few pieces of information. However, there is a multitude of other data that can be included in an attribute set. These are described in various categories on the attribute set class:
- CSSearchableItemAttributeSet_Documents allows for the storage of attributes relating to text documents e.g the page count, the names of fonts used in the document, and the name of the software used to create the document.
- CSSearchableItemAttributeSet_Events makes provision for attributes relating to temporal events, such as start and end dates, due dates, and completion dates etc.
- CSSearchableItemAttributeSet_Images provides a way to store vast amounts of image metadata, for example the colour space, pixel size, focal length, aperture, exposure, even the name of the owner of the camera.
- CSSearchableItemAttributeSet_Media lets us store the details of audio or video media, such as a list of the projects the media is used in, copyright details, and the languages used in the media item. Even more details are available for audio metadata, like the key signature, tempo, instruments used, the sample rate, and the composer.
- CSSearchableItemAttributeSet_Messaging adds extra properties for storing message metadata, for instance the recipients, mailbox identifiers, authors, and instant messaging addresses.
- CSSearchableItemAttributeSet_Places makes it possible to store location information in a set of attributes like latitude, longitude, and altitude, as well as GPS values such as the track, status, and measure mode.
All of these properties are listed in the CSSearchableItemAttributeSet documentation.
Integrating Search Data with System Apps
If your indexed data contains location or phone number details, you can add the ability to make a phone call or get directions from your search results in the Spotlight UI. Simply set the supportsPhoneCall or supportsNavigation properties to 1, and provide a phone number or latitude and longitude values in your searchable item's attribute set.
attributeSet.latitude = 52.083333
attributeSet.longitude = -0.416667
attributeSet.supportsNavigation = 1
The user simply has to tap the phone or directions icon in your search result to either place a phone call or begin routing:
Conclusion
As you can see, adding your application's data to Core Spotlight is a simple process which with little development produces great results. Integrating with Spotlight will make your app feel like a first-class citizen on iOS, and will help to increase usage amongst your users. If you haven't already, I urge you to check out the sample project to see how easy it is to provide a great user experience through Spotlight search.