Modern View Layout on iOS 9
In iOS 6 Apple released Auto Layout, which gave developers a declarative API for laying out user interfaces, saving us from hours of laborious and bug-prone setFrame: coding. Since then, Apple has added complementary technologies such as Size Classes and UIStackView to aid the development of adaptive user interfaces (see Adaptive User Interfaces with UIStackView). Developing interfaces that adjust gracefully to different sized devices as well as features like Split-Screen Multitasking would be practically impossible without Auto Layout, therefore any modern approach to developing user interfaces must be based on Auto Layout.
However, since iOS 6 the day to day usage of Auto Layout has not received much attention from Apple. Even basic layout in code to, for example, layout a series of views in a vertical or horizontal sequence required an unwieldy amount of boilerplate code. Fortunately in iOS 9 Apple has added some new tools to make working with Auto Layout much simpler.
NSLayoutAnchor
As an example of the difficulties of using Auto Layout in code, laying out just two views to be vertically aligned and have equal size requires the following:
// Layout two views to be vertically aligned and of equal size
let verticalConstraint = NSLayoutConstraint(item: viewTwo, attribute: .Top, relatedBy: .Equal, toItem: viewOne, attribute: .Bottom, multiplier: 1.0, constant: 8.0)
let leadingConstraint = NSLayoutConstraint(item: viewTwo, attribute: .Leading, relatedBy: .Equal, toItem: viewOne, attribute: .Leading, multiplier: 1.0, constant: 0)
let widthConstraint = NSLayoutConstraint(item: viewTwo, attribute: .Width, relatedBy: .Equal, toItem: viewOne, attribute: .Width, multiplier: 1.0, constant: 0)
let heightConstraint = NSLayoutConstraint(item: viewTwo, attribute: .Height, relatedBy: .Equal, toItem: viewOne, attribute: .Height, multiplier: 1.0, constant: 0)

self.view.addConstraints([verticalConstraint, leadingConstraint, widthConstraint, heightConstraint])
And this is just for two views! Now, on iOS 9 we could achieve this vertical stack layout without having to create the constraints ourselves by using UIStackView. However, you may have a layout that cannot be achieved using stack view, so for such purposes Apple has provided a new way to create these constraints without the headaches and all that typing.
NSLayoutAnchor is a new factory class for creating typical boilerplate constraints. Using them instead of manual constraint creation allows us to simplify the above code to the following:
// Layout two views to be vertically aligned and of equal size
viewTwo.topAnchor.constraintEqualToAnchor(viewOne.bottomAnchor, constant: 8.0).active = true
viewTwo.leadingAnchor.constraintEqualToAnchor(viewOne.leadingAnchor).active = true
viewTwo.widthAnchor.constraintEqualToAnchor(viewOne.widthAnchor).active = true
viewTwo.heightAnchor.constraintEqualToAnchor(viewOne.heightAnchor).active = true
This layout anchor code is far more concise and much easier to read than the old manual constraint-creation code: viewTwo.widthAnchor.constraintEqualToAnchor(viewOne.widthAnchor) very clearly constrains the width of viewTwo to equal the width of viewOne. We can also do away with the separate variables as we no longer need to use variable names to hint at what the constraint does as that is now clearly visible from the code. Setting the returned constraints' active properties to true installs them in the view hierarchy without having to call addConstraints: ourselves.
Layout anchors are available for all of the UIView attributes that can be constrained with Auto Layout (top, bottom, centreX etc) so if you're targeting iOS 9 there's no reason not to adopt them immediately and save yourself from mountainous constraint-creation code!
UILayoutGuide
In iOS 8, UIView gained a layoutMargins property. These margins set up an internal border within a view, to which the view's subviews can be aligned. For example, a layoutMargin with its top, right, bottom, and left values set to 8 would create an internal border inset eight points from the view's edges.

The only problem with the layoutMargins property is that it holds UIEdgeInsets. As UIEdgeInsets is a struct we cannot directly bind any constraints to its values - instead we have to use its values as constraint constants. To react to changes to the layout margin edge insets a view needs to override layoutMarginsDidChange() in order to update its constraints to reflect the new margins. The "Auto" in Auto Layout does not seem to apply here.
But there is another way! One of the other tools added in iOS 9 is UILayoutGuide. These layout guide objects simply define a region within a view, which is described by the guide's layoutFrame property. This frame is a CGRect, which is also not particularly useful for Auto Layout. However, the layout guide object also has NSLayoutAnchor properties just like the ones we saw in our earlier example. Thanks to these, we can bind to the layout guide's top, bottom, leading etc edges, just like we can with a view.
Why is this relevant to layout margins? Because in iOS 9 UIView now has a layoutMarginsGuide property, which represents the view's layout margins as a layout guide. Thanks to this, we can now bind subviews to their superview's layout margins via the layoutMarginsGuide property, which gets us the expected Auto Layout behaviour i.e no need to override layoutMarginsDidChange(). Auto Layout becomes automatic once again.
To bind a subview to fill it's superview up to its layout margins is now as simple as this:
subview.topAnchor.constraintEqualToAnchor(containerView.layoutMarginsGuide.topAnchor).active = true
subview.bottomAnchor.constraintEqualToAnchor(containerView.layoutMarginsGuide.bottomAnchor).active = true
subview.leadingAnchor.constraintEqualToAnchor(containerView.layoutMarginsGuide.leadingAnchor).active = true
subview.trailingAnchor.constraintEqualToAnchor(containerView.layoutMarginsGuide.trailingAnchor).active = true
If the superview layout margins change our subview will automatically resize to remain bound to them.
UILayoutGuide is not limited to describing layout margins, but can be used to represent any region within a view. For example, it can be used in the place of invisible "spacer" views that are often added to provide padding between visible subviews. They can also be used to break subview hierarchies up in to modular regions to make maintenance easier. These techniques are described with examples in Apple's documentation.
Conclusion
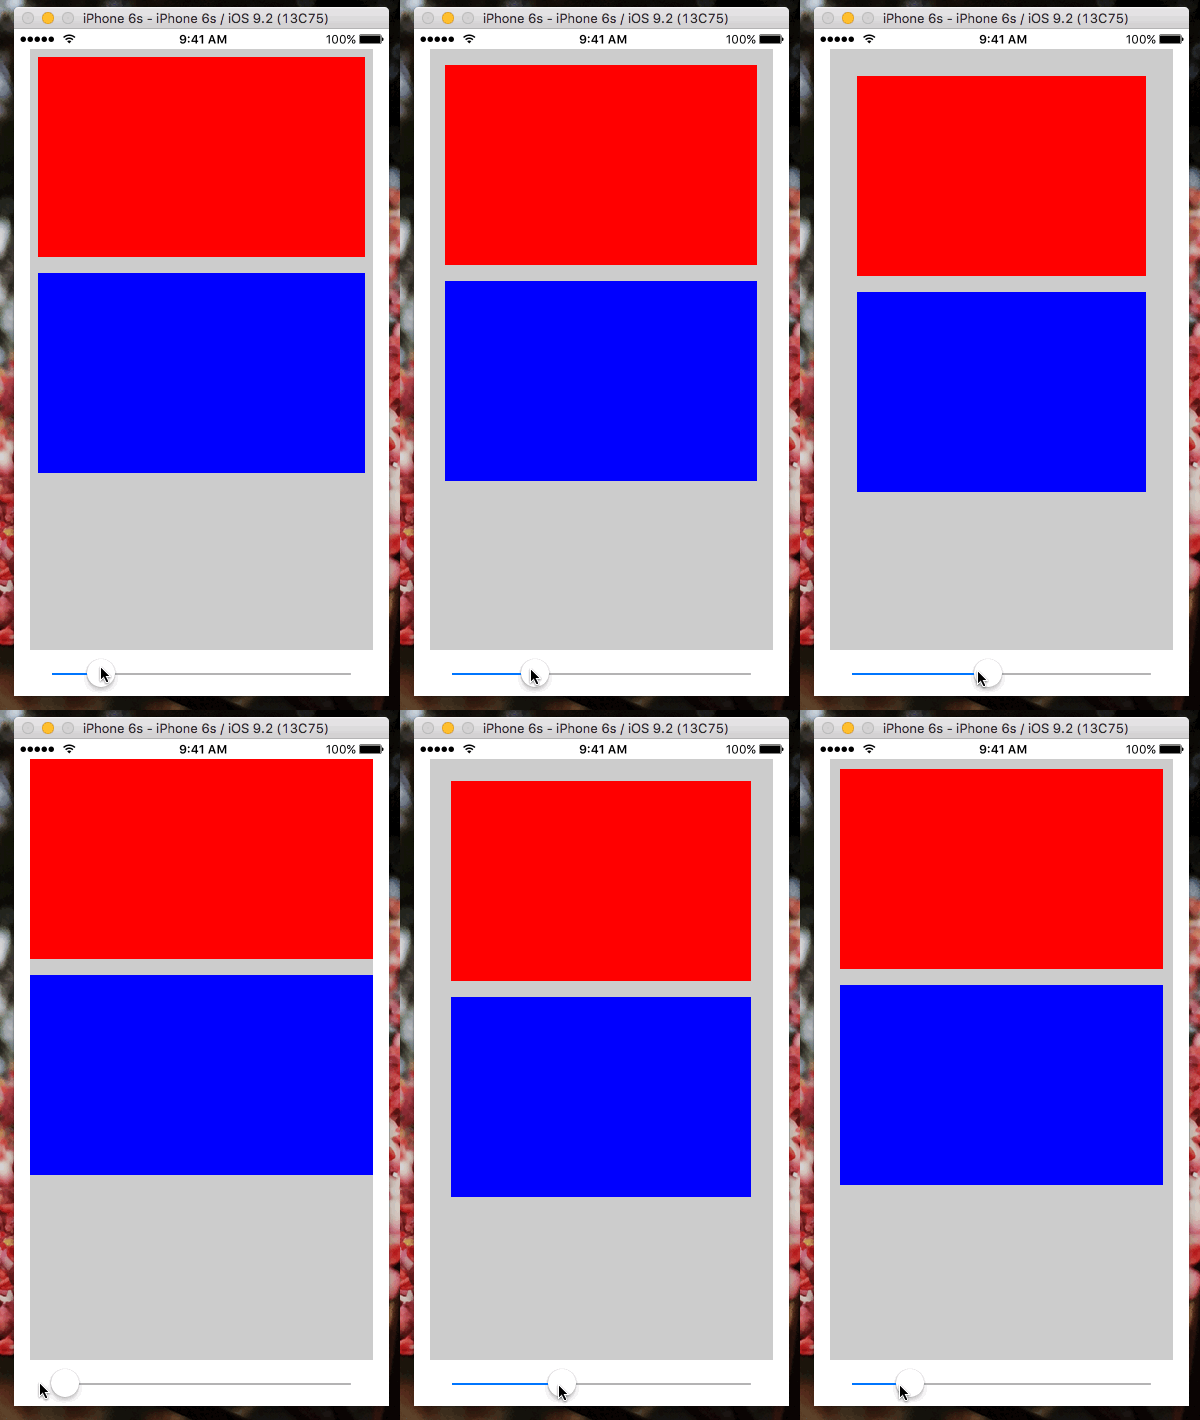
With iOS 9, Apple has put some of the "Auto" back in to Auto Layout. Using the new APIs outlined above, you can create user interfaces that will respond gracefully to size changes and build views that adapt to different environments automatically. I have built an example project that you can download here which demonstrates the techniques of constraining views to each other and to superview layout margins using layout anchors. The container view's layout margins can be updated using the slider at the bottom of the interface, and the subviews are laid out automatically in response to this change:
