Recreating the iPadOS Settings App Navigation Bar Style
With the release of iPadOS in 2019, Apple confirmed their commitment to treating the iPad as a serious computing platform in its own right. Additions to the user interface such as slide-over and split-view multitasking, App Exposé, redesigned sidebars, and Multi-Window UIs all demonstrate how Apple is focussed on transitioning iPad from a content consumption device to a "traditional computer" replacement for many users. As their technical underpinnings are identical, iPadOS is primarily differentiated from iOS via changes to the user interface of the operating system.
Today we will be focussing on one small element of iPadOS's design - the navigation bar style used in the secondary column of the Settings app's split view.
Disappearing Act
When launching the Settings app, we see a split view with navigation controllers in the primary and secondary columns. So far, so standard. One thing that is different, however, is the secondary column's navigation bar, which has a transparent background. It doesn't stay that way for long though…
As we can see above, when the user starts to scroll the secondary column's content, the navigation bar background is gradually faded in. When returning to the top of the content, the background is hidden again. But how can we achieve this effect in our own apps?
Keeping Up Appearances
The first release of iPadOS introduced a new API for controlling the appearance of navigation bars - UINavigationBarAppearance. This object contains a whole host of properties that we can use to modify the appearance of a navigation bar, from the background blur effect and colour, to title position adjustments and text attributes. Furthermore, UINavigationBar gained three new properties for storing instances of UINavigationBarAppearance:
standardAppearance- The appearance settings for a standard-height navigation bar.compactAppearance- The appearance settings for a compact-height navigation bar.scrollEdgeAppearance- The appearance settings to use when the edge of any scrollable content reaches the matching edge of the navigation bar.
At first glance, it looks like scrollEdgeAppearance is exactly what we're looking for. If we create an instance of UINavigationBarAppearance, call configureWithTransparentBackground on it, and assign it to the scrollEdgeAppearance property of our navigation bar, we should be all set, right? Well… not quite. scrollEdgeAppearance is only used by navigation bars with large titles:
In the example above, we have scrollEdgeAppearance configured with a green background, and standardAppearance configured with a red background. During scrolling, the navigation bar transitions between the two appearances. Without large titles, no such transition occurs:
The Settings app's secondary column's navigation bar uses standard sized titles, so scrollEdgeAppearance is of no use to us. We will have to come up with out own implementation to mimic the behaviour seen in the Settings app.
Another Way
If we want to copy the Settings app's navigation bar behaviour, we're going to have to roll up our sleeves and write some code. But not to worry, it's actually relatively straightforward.
First, we need to be able to find the scroll view that should be monitored when the user scrolls. We do this by adding an extension to UIView:
extension UIView {
    func firstSubview<T: UIView>(ofKind kind: T.Type) -> T? {
        for subview in subviews {
            if let matchingSubview = subview as? T ?? subview.firstSubview(ofKind: kind) {
                return matchingSubview
            }
        }
        return nil
    }
}
This function performs a depth-first search of the receiver's subviews array to find the first instance of a view of the given type. We make use of this in a further extension on UIViewController:
extension UIViewController {
    var primaryChildScrollView: UIScrollView? {
        if let scrollView = view as? UIScrollView {
            return scrollView
        }
        view.layoutIfNeeded()
        return view.firstSubview(ofKind: UIScrollView.self)
    }
}
This adds a property named primaryChildScrollView, which can be called on any view controller to find its primary scroll view. In the case of a UITableViewController or UICollectionView controller, the receiver's view will be a scroll view, so we return that. Otherwise, we layout the view to ensure that all of its subviews are present, then use the firstSubview function that we added to UIView in order to find the first scroll view in the view hierarchy.
Now that we have a way to find the scroll view that we're interested in, we need a way to calculate the correct alpha value for our navigation bar based on the current scroll position of the scroll view. We do this with yet another extension, this time on UIScrollView:
extension UIScrollView {
    var navigationBarAlphaForCurrentScrollPosition: CGFloat {
        let scrolledDownDistance = contentOffset.y + safeAreaInsets.top
        let scrollDistanceRequiredToShowNavigationBar: CGFloat = 10
        return min(1, max(0, scrolledDownDistance / scrollDistanceRequiredToShowNavigationBar))
    }
}
This adds a property called navigationBarAlphaForCurrentScrollPosition, which does exactly what it says on the tin. It calculates the distance that the user has scrolled down, and uses that value to calculate the correct alpha value for the navigation bar. We want to fade the navigation bar in as the user scrolls over the first ten points of scroll view content, so we divide the scrolled distance by 10 to calculate our alpha, capping the computed value between 0 and 1 as this is the range of numbers valid for an alpha value.
Finally, we need a way to configure a navigation bar's background for a given alpha value. We do this with, you guessed it, another extension:
extension UINavigationBar {
    func setBackgroundAlpha(_ backgroundAlpha: CGFloat) {
        subviews.first?.alpha = backgroundAlpha
    }
}
The background view of the navigation bar is the first view in its subviews array, which makes sense seeing as the Z-order of views is expressed by their order in this array. We simply set this view's alpha property to the passed in value.
Putting the Pieces Together
Now that we have all of the helpers that we need, it's time to build our solution. We will create a subclass of UINavigationController, and give it a single property:
private var scrollViewContentOffsetObservation: NSKeyValueObservation?As you can hopefully tell from the name, this property will store an observer for the scroll view whose content offset we will observe to detect when the user is scrolling.
Next, we need to override the pushViewController function:
override func pushViewController(_ viewController: UIViewController, animated: Bool) {
    super.pushViewController(viewController, animated: animated)
    configureScrollingObservation(forViewController: viewController)
}
We call super to show the given view controller, and then call in to our configureScrollingObservation function, which is at the heart of our implementation, and is as follows:
private func configureScrollingObservation(forViewController viewController: UIViewController) {
    scrollViewContentOffsetObservation = nil
    guard let scrollView = viewController.primaryChildScrollView else {
        navigationBar.setBackgroundAlpha(1.0)
        return
    }

    let transitionCompletion: ((UIViewControllerTransitionCoordinatorContext?) -> Void) = { [weak self] _ in
        guard let self = self else { return }
        self.navigationBar.setBackgroundAlpha(scrollView.navigationBarAlphaForCurrentScrollPosition)
        self.scrollViewContentOffsetObservation = scrollView.observe(\.contentOffset) { [weak self] (scrollView, _) in
            self?.navigationBar.setBackgroundAlpha(scrollView.navigationBarAlphaForCurrentScrollPosition)
        }
    }

    if let transitionCoordinator = self.transitionCoordinator {
        transitionCoordinator.animate(alongsideTransition: { [navigationBar] _ in
            navigationBar.setBackgroundAlpha(scrollView.navigationBarAlphaForCurrentScrollPosition)
        }, completion: transitionCompletion)
    } else {
        transitionCompletion(nil)
    }
}
There's quite a lot to unpack here, so let's start from the top. First, we clear any existing scroll view content offset observation. We are about to push a new view controller, so the scroll view of the currently displayed view controller no longer needs to be observed.
Secondly, we check for the presence of a scroll view in the new view controller. If we can't find one, we set the navigation bar's background alpha to its default and return early.
Next, we need to configure what happens when the push completes and the new view controller is displayed. We need to do two things:
- Configure the navigation bar alpha based on the scroll position of the new view controller's scroll view.
- Set up a scroll view observer to update our navigation bar's alpha when the scroll view is scrolled.
We store this behaviour in a closure for the final step, which is to check for the existence of a transition coordinator. If one is present, it means that the view controller is being pushed with animation, in which case we need to animate our navigation bar's alpha to the correct value alongside the push animation. Fortunately this is simple enough to do, using -[UIViewControllerTransitionCoordinator animateAlongsideTransition:completion:]. We add an animation closure to our transition coordinator to animate the navigation bar's alpha alongside the push animation, and pass in the completion closure we created earlier.
If our transitionCoordinator is nil, then we don't need to worry about an animated transition and can call our completion closure immediately.
Handling Pop Operations
Of course, view controllers aren't just pushed on to navigation controllers, they are also popped off, so we need to handle this too. Mercifully, it's incredibly simple:
override func popViewController(animated: Bool) -> UIViewController? {
    let poppedViewController = super.popViewController(animated: animated)
    if let topViewController = topViewController {
        configureScrollingObservation(forViewController: topViewController)
    }
    return poppedViewController
}

override func popToViewController(_ viewController: UIViewController, animated: Bool) -> [UIViewController]? {
    let poppedViewControllers = super.popToViewController(viewController, animated: animated)
    configureScrollingObservation(forViewController: viewController)
    return poppedViewControllers
}

override func popToRootViewController(animated: Bool) -> [UIViewController]? {
    let poppedViewControllers = super.popToRootViewController(animated: animated)
    if let topViewController = topViewController {
        configureScrollingObservation(forViewController: topViewController)
    }
    return poppedViewControllers
}
All we are doing in these pop functions is calling super, then calling the same configureScrollingObservation function that we wrote earlier, passing in the view controller that the user is popping to. Note that we always call super before configuring our scroll observer as the call to super configures our transitionCoordinator that we rely on to handle animated transitions.
Let's have a look at the finished product:
Our navigation bar is being hidden and shown correctly based on the user's scrolling in the currently shown view controller. Very nice!
Cancellable Transitions
The wilier developers reading this may have spotted a potential flaw with this solution already. Our use of the transitionCoordinator allows us to animate our navigation bar changes alongside the pushing or popping of a view controller. However, interactive pop transitions can be cancelled i.e the user, dragging from the leading edge of the device's screen to pop a view controller, can change their mind and cancel the pop by swiping back towards the leading edge. This cancels the transition, which is not a scenario that our current implementation takes in to account. You may think, in the specific case of a navigation controller in the secondary column of a split view controller, that this will never be a problem because the column is positioned away from the leading edge of the screen. However, iPadOS 14.5 added -[UISplitViewController displayModeButtonVisibility], which allows the display mode button to always be shown by setting the value to .always. If presentsWithGesture is set to false then swiping from the leading edge of the screen when the primary column has been hidden will not slide the primary column on to the screen. The combination of presentsWithGesture being set to false and displayModeButtonVisibility set to .always means that when the primary column has been collapsed, swiping from the leading edge of the screen will trigger an interactive pop transition on the secondary column navigation controller. Currently, if the user cancels the transition, we still configure the scroll observer to observe the scroll view in the view controller that the user was popping to, even though they cancelled the transition. This breaks our navigation bar hiding behaviour as the currently shown scroll view's scrolling is not observed:
Luckily for us, the transition coordinator passes us an instance of UIViewControllerTransitionCoordinatorContext, which contains a boolean isCancelled property. We can check this, and if the value is true when then transition completes, we can simply configure our scroll view observer for the current visibleViewController. All this requires is adding the following to our transition completion handler:
if let context = context, context.isCancelled, let visibleViewController = self.visibleViewController {
    self.configureScrollingObservation(forViewController: visibleViewController)
    return
}
When the cancelled transition completes we are now observing the correct scroll view:
One Word of Caution
Whilst this technique does not rely on any private API and is therefore safe to submit to the App Store, it does rely on a private implementation detail of UINavigationBar because we assume that the navigation bar's background is the first subview in the navigation bar's subviews array. As mentioned before, this assumption does make sense because the Z-order of subviews is determined by their position in this array. However, there is nothing to stop Apple changing the subviews of UINavigationBar and potentially adding another view in behind what we consider to be the navigation bar's background. As such, there is no guarantee that this technique will not break in a future iPadOS release, or with particular navigation bar configurations. Its use is very much at your own risk.
A sample project with the full implementation and example app is available on GitHub.
Addendum: How Does Apple Do It?
The background of UINavigationBar is implemented by a private _UIBarBackground view. iPadOS 13.1.3's implementation of this view gained a new layout property, which holds an instance of _UIBarBackgroundLayout. This layout class contains a read-write backgroundAlpha property, which is responsible for setting the bar background's alpha value.
iPadOS 13.1.3 also added a few new properties to UINavigationItem, namely _manualScrollEdgeAppearanceEnabled and _manualScrollEdgeAppearanceProgress. Setting _manualScrollEdgeAppearanceEnabled to true means that by default the navigation bar draws using its scrollEdgeAppearance - even navigation bars with small titles. After this, setting _manualScrollEdgeAppearanceProgress to 0.0 means that the navigation bar will draw using scrollEdgeAppearance, and setting it to 1.0 means the navigation bar will draw using its standardAppearance. Using values between 0.0 and 1.0 allows the navigation bar to crossfade between scrollEdgeAppearance and standardAppearance, which is exactly what Apple does in the Settings app.
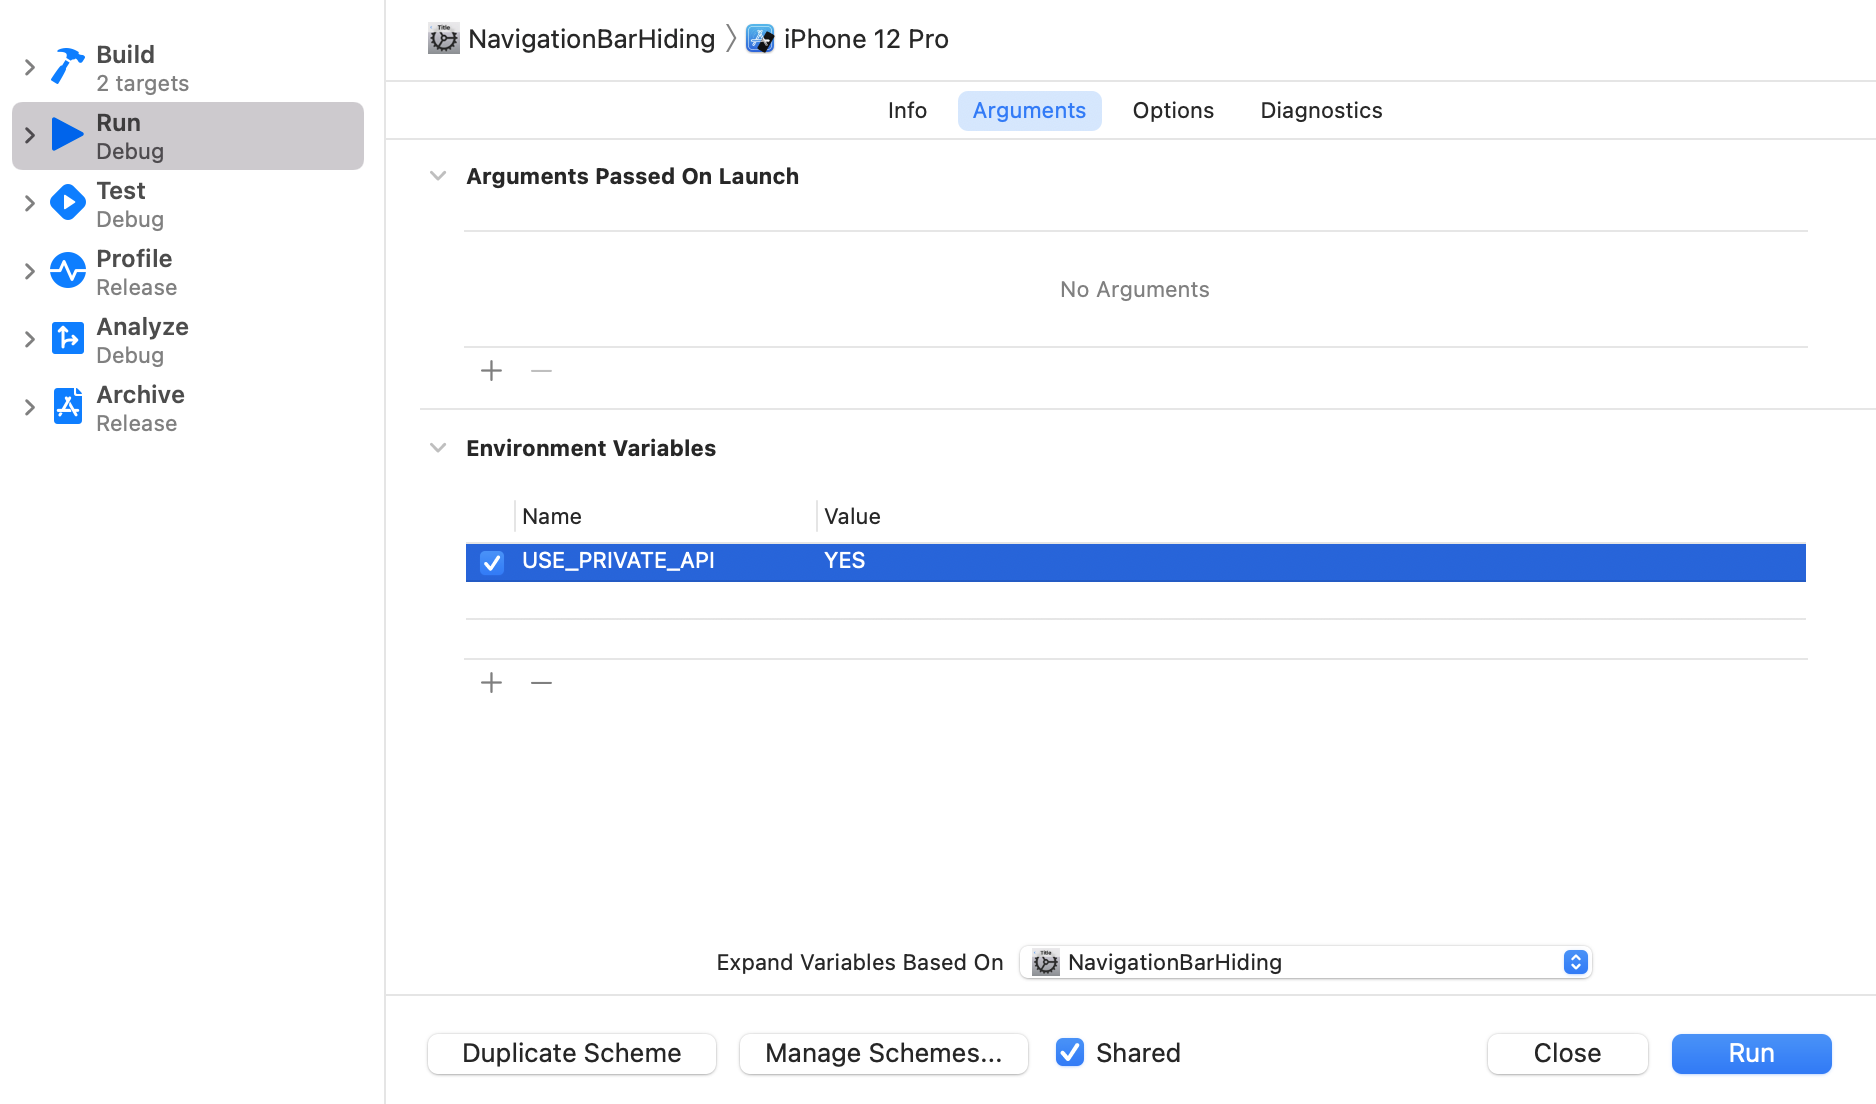
If you would like to see the example app running using this private API, simply run the NavigationBarHiding scheme with the USE_PRIVATE_API environment variable set to YES.