Spotlight Search Enhancements in iOS 10
Back when iOS 9 was released, Apple made great advances to make the system Spotlight search more useful to users by allowing third-party apps to integrate their data with the Spotlight database (for more details, see Indexing App Content with Core Spotlight). By allowing your application's data to be indexed, you can increase engagement with your app by allowing users to find their content in one convenient location.
There were, however, a couple of glaring omissions from this round of updates. The first was that the Spotlight index was a complete black box. You could put data in to it, but there was no way to get anything back out again. The second was that while users could perform a simple text search in the Spotlight UI to find your content, there was no way to extend this functionality to allow for more complex queries. Spotlight had been opened up, but we were only allowed a peek in to it. Now, in iOS 10, we can go much further.
Continue Spotlight Searches in Your App
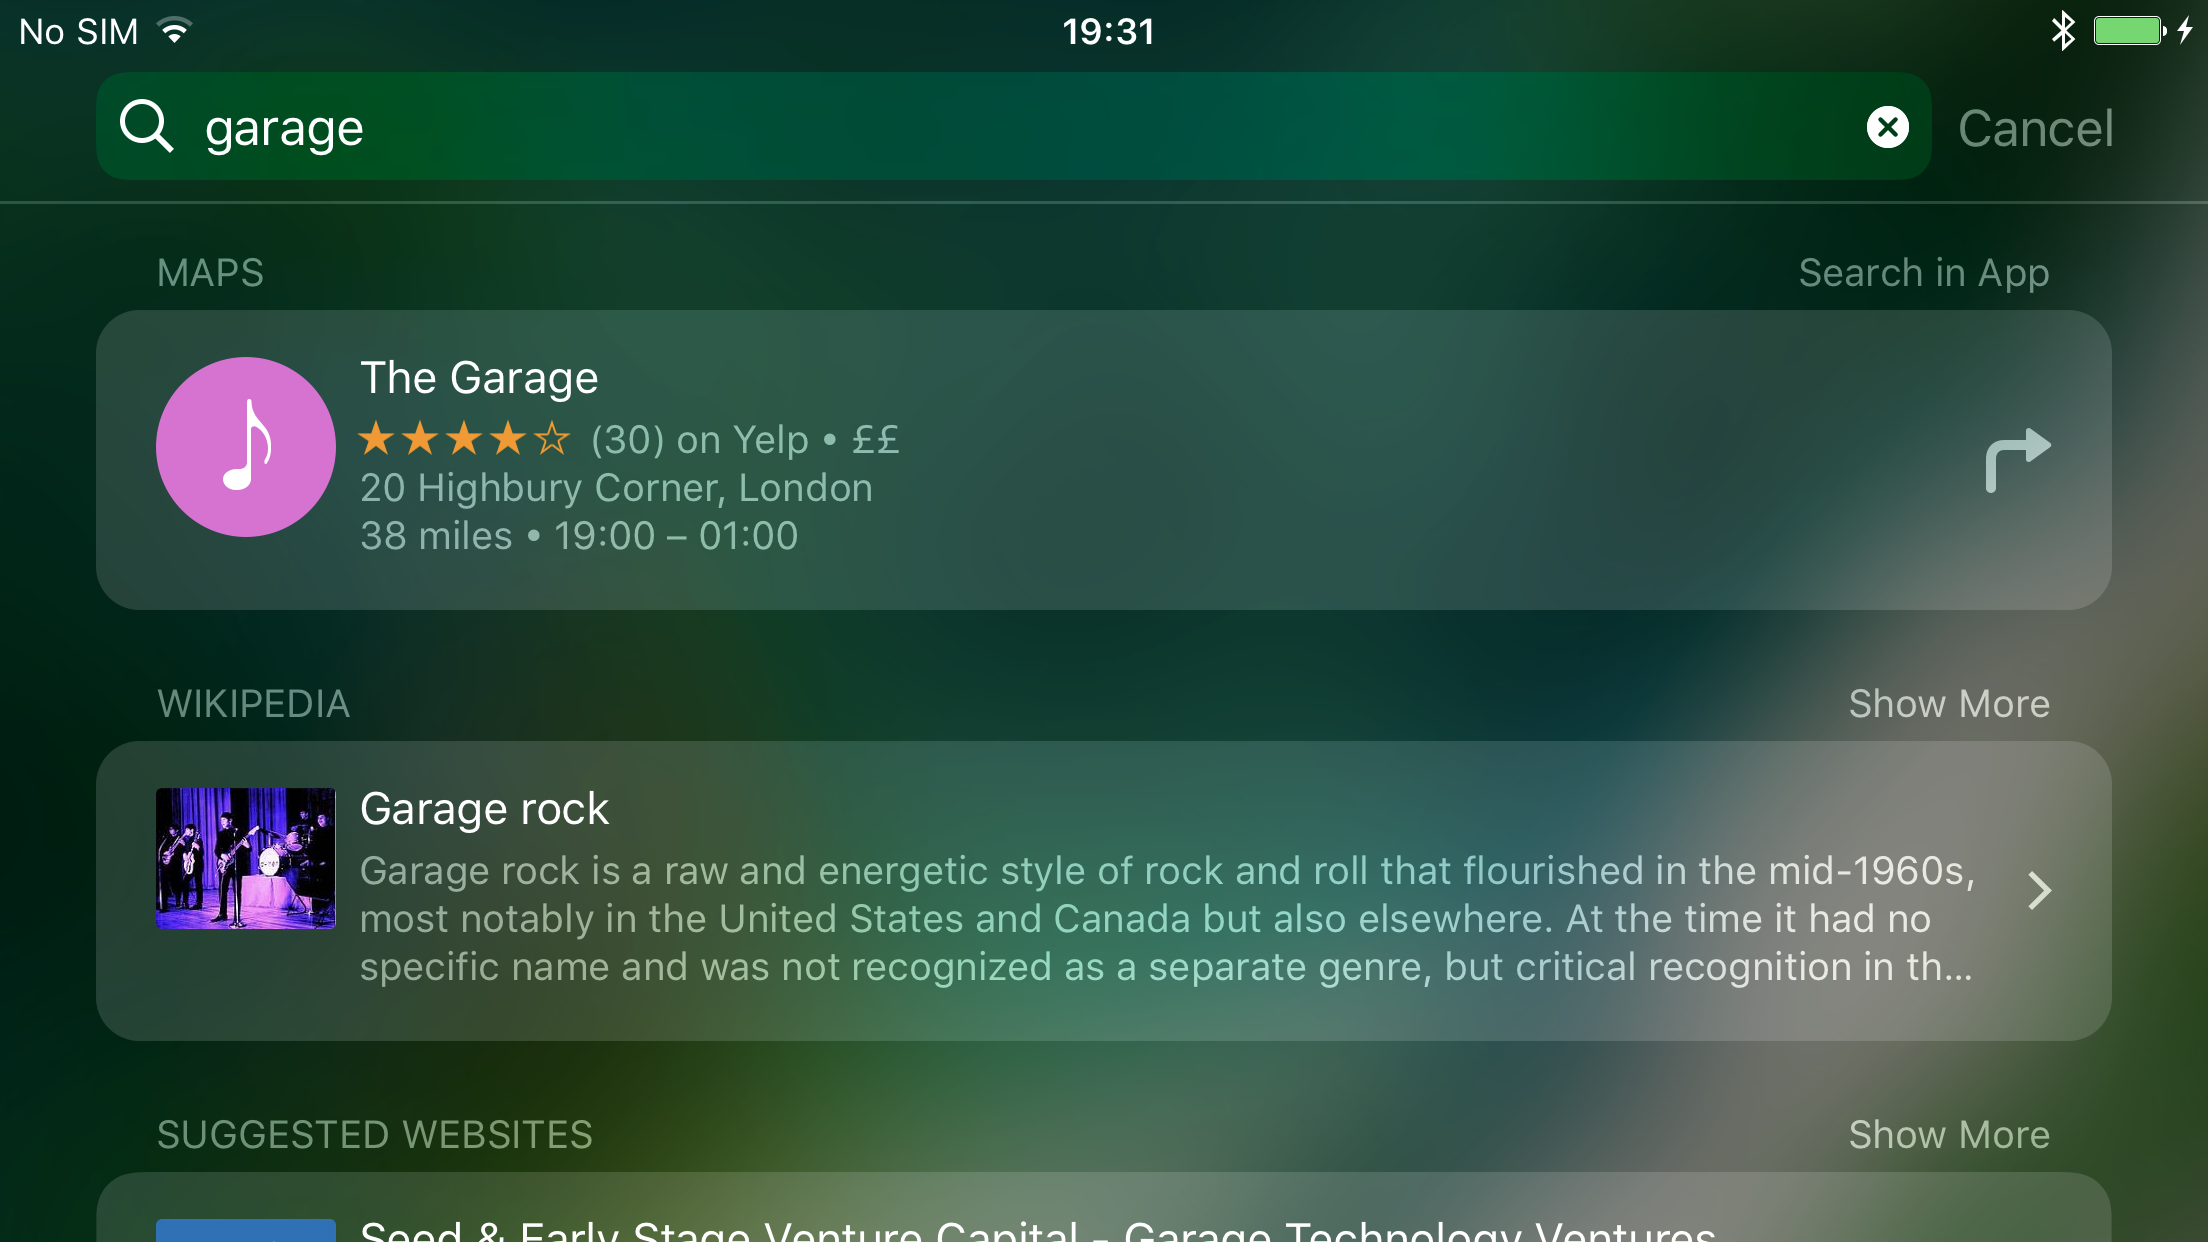
A somewhat under-advertised feature of iOS 10's Spotlight search is that searches can now be continued inside apps. Take a look at the following search:

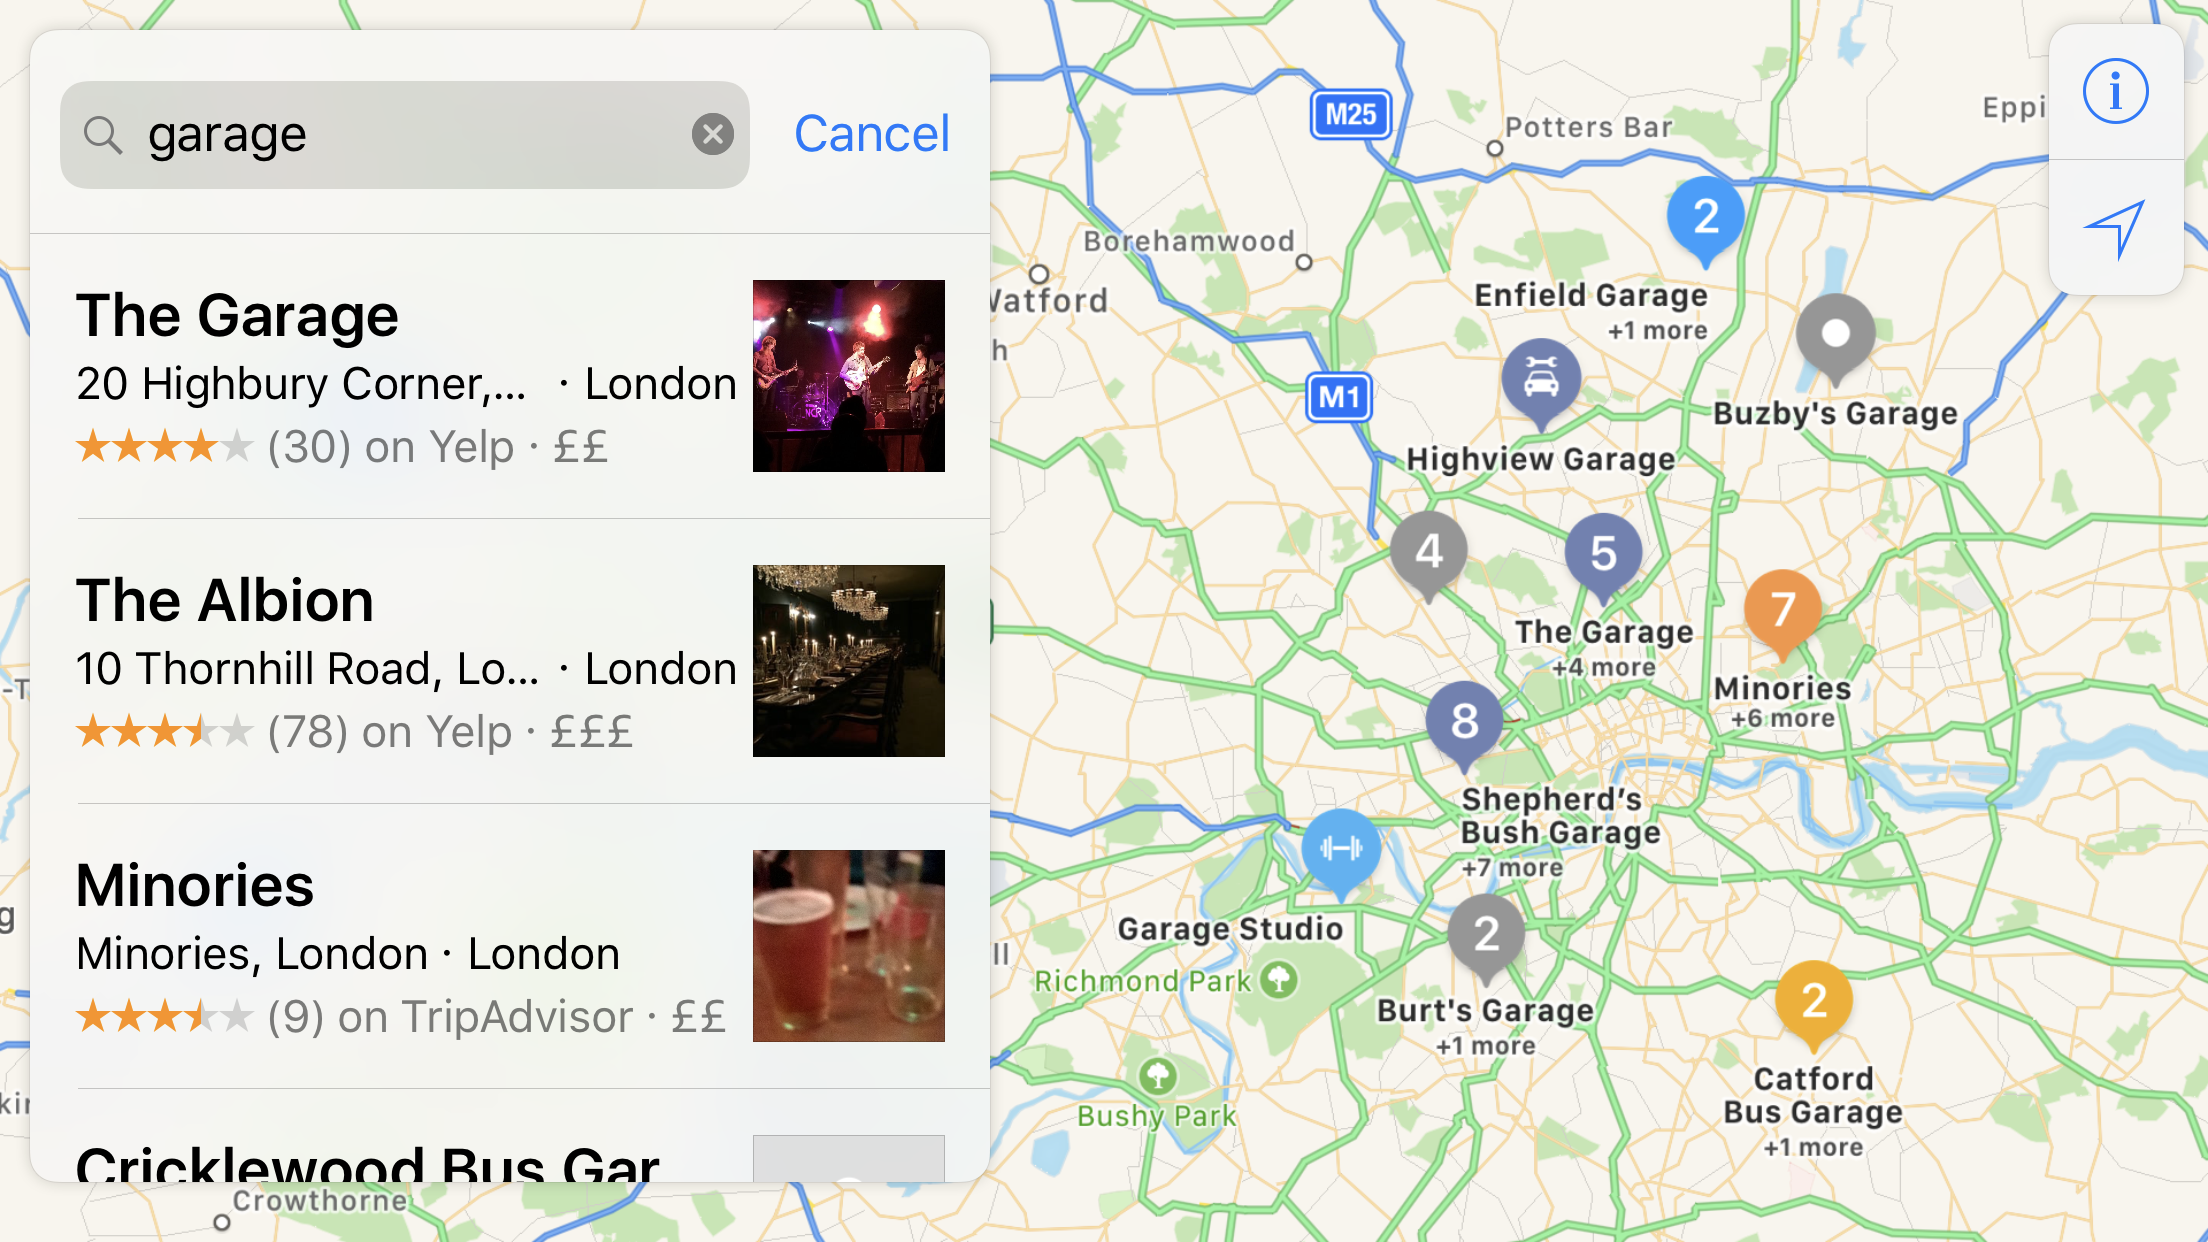
Notice that the Maps app does not have the "Show More" option next to its results. Instead there is an option to "Search in App". Tapping this options takes us straight in to the Maps app with the results of the search displayed to us:

Previously the only option was to show more search results in the Spotlight UI. However, this only provides limited information to the user before they make a choice to select a result. By allowing user's to continue their search in the app, they can take advantage off the extra detail provided in the app, and can refine their search further if they so choose.
You might think that extending your app to allow Spotligh searches to continue within it would be difficult. But you'd be wrong! Let's see how it's done.
First, you will need to add the CoreSpotlightContinuation key to your application's Info.plist file. Make this a Boolean property and set it to true. Providing you have content indexed in the Spotlight database, when it shows up in the Spotlight UI you should now see the "Search in App" option appear next to the results. If this doesn't work straight away you will need to reboot the simulator or restart your phone.
Once you have done this, you simply need to implement a single application delegate method to respond to the user tapping on the "Search in App" option:
func application(_ application: UIApplication, continue userActivity: NSUserActivity, restorationHandler: @escaping ([Any]?) -> Void) -> Bool {
    if let searchText = userActivity.userInfo?[CSSearchQueryString] as? String {
        // Show your search UI
    }
}
And that's it! The user's search string is passed to you using the CSSearchQueryString key in the user activity's userInfo dictionary. It is up to you how your application handles continuing the search. Which brings us neatly to our next topic.
Searching the Spotlight Database
One thing you may notice is that when you continue a search in your app, the search results are different to what was shown in the Spotlight UI. This will be because the way you query your own data set does not match how Spotlight queries its own. Fortunately in iOS 10 we now have the ability to query the Spotlight database ourselves, so we can easily match the Spotlight UI's results. Let's take a look at how to do that.
To follow along with a working project, take a look at the trusty County examples project on Github. Specifically, we will be looking at the SpotlightSearchController class.
The first thing we need is somewhere to store the user's search results, which is easily done:
/// The results returned by the most recent search.
private(set) var searchResults = [County]()
As we will be querying the Spotlight database, we will need a way to store a reference to our query (the reason for this will become clear in a moment). Again, nothing too taxing:
private var query: CSSearchQuery? {
    didSet {
        // We have a new search query, so remove all old search results.
        searchResults.removeAll()
    }
}
We will need a new CSSearchQuery object each time the user performs a search. As this property changes when each search begins, it makes sense to clear out any existing search results in the process.
Now, on to the querying:
/// Performs a search on the Spotlight database with the given query string.
///
/// - Parameters:
///   - queryString: The query string to search for.
///   - completionHandler: The handler to call when the search is completed.
func search(withQueryString queryString: String, completionHandler: @escaping () -> Void) {
    query?.cancel()

    query = CSSearchQuery(queryString: spotlightQueryString(fromQueryString: queryString), attributes: [])

    query?.foundItemsHandler = { [unowned self] (items) in
        self.searchResults.append(contentsOf: items.flatMap { County.countyForName($0.uniqueIdentifier) })
    }

    query?.completionHandler = { (error) in
        guard error == nil else {
            print("Error: \(error?.localizedDescription)")
            return
        }
        DispatchQueue.main.async {
            completionHandler()
        }
    }

    query?.start()
}
This is the function we call on our search controller whenever the user wants to perform a search. It is passed the user's query string and a completion handler to be called when the search has finished. Let's break it down and see how it works.
The first thing we do is cancel any currently running query. If the user is typing in to the search field as a query is executing we don't want any results from the previous search to be returned; cancelling the current query ensures that this doesn't happen.
Next we create a new query, constructed using the given search string. There is a detailed query language that can be used to create powerful queries, which is documented in the CSSearchQuery API Reference. For our purposes, we will simply create a query string that escapes quotes and backslashes and uses appropriate comparison modifiers (see the Github repo for the exact implementation). We can also specify a particular set of attributes to be returned by the query, which helps to limit the amount of data to be returned from the Spotlight database, improving the search speed. As in this example we only need the uniqueIdentifier from the CSSearchableItem instances that the query will return, we don't need to specify any attributes here.
The next thing is the CSSearchQuery object's foundItemsHandler. This is called with the aforementioned CSSearchableItem instances that the Spotlight index returns as a result of your query. In this handler you have a chance to map these items back to your application's domain model, which in our case is a list of counties. Having done this, we store the counties in our searchResults property.
After this we have the completionHandler of the CSSearchQuery, which as its name implies, is called when the search completes. This handler is not called if the query is cancelled, so you only need to handle the query completion case in this handler. Having checked for any errors, we call the completion closure passed in to the function. The completionHandler is called on an arbitrary background queue, so make sure to synchronise on to a queue that is appropriate to your caller (synchronising to the calling queue can be achieved using the OperationQueue API).
Finally, we call the start() function on our newly created query, which kicks off the search on the Spotlight database.
Bringing It All Together
We have now seen how to integrate both Spotlight search continuation and Spotlight index querying in to our apps. How does it all look?

Pretty nice! The user can now begin a search in the Spotlight UI, and continue in our app right where they left off.
It's worth noting here that thanks to CoreSpotlight.framework it only takes a tiny two-property class with a simple search function to perform incredibly fast and powerful searches across your application's indexed data. Before iOS 10, implementing this yourself would have been an enormous amount of work. Now, it can be achieved in a matter of minutes.
Conclusion
Thanks to advances in the CoreSpotlight framework, your application can now implement super-fast search in record time, with very little custom code required. Simply add your application data to the Spotlight index*, and let the framework perform the heavy lifting for you. Making these simple changes to your app will enable you to integrate deeply in to iOS and make your app feel completely at home on the system. If you haven't already, take a look at the sample project to see just how easy it is to integrate with Spotlight search on iOS 10.
*For more details on adding application data to the Spotlight index, see Indexing App Content with Core Spotlight